
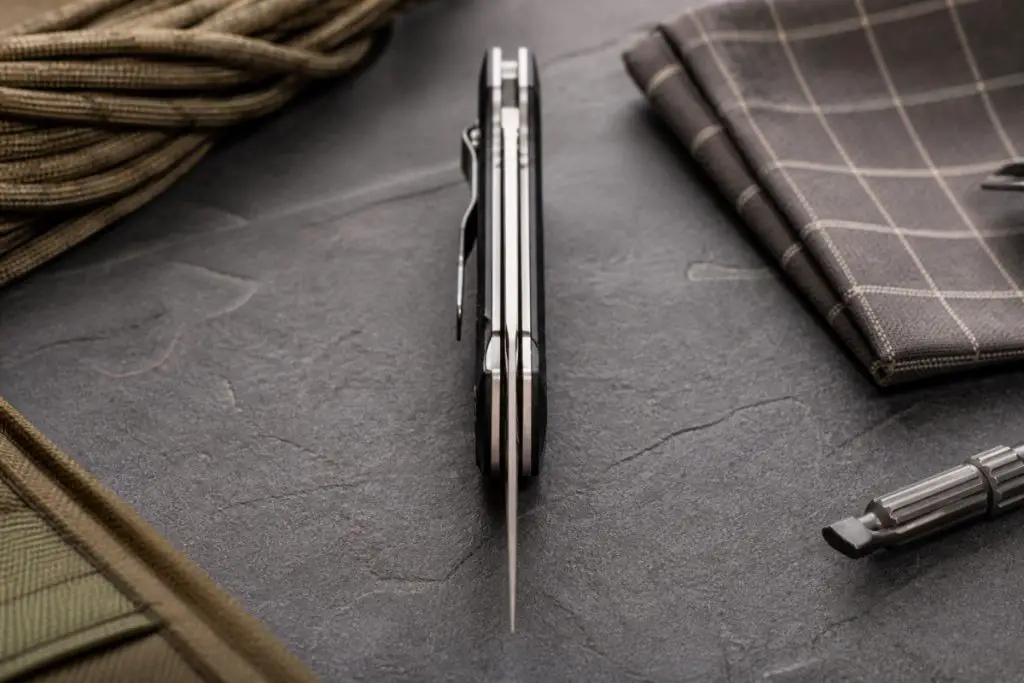

How to Center a Folding Knife Blade Safely
The quick answer
If you want a short, reliable answer: the least-invasive way to correct blade off-centering is a step-by-step sequence of cleaning the pivot area, adjusting pivot tension in small increments with the correct driver, testing for blade rub, and finally checking scale/liner alignment without taking the knife completely apart. This method often resolves most centering issues while preserving factory settings and warranty. Below you will find practical diagnostics, a symptom-to-cause chart, torque cautions, and a clear checklist so you can reliably tell harmless cosmetic centering from true blade rub.
Context
Daily EDC gear enthusiasts—whether new to pocketknives or experienced collectors—expect a folding knife to open smoothly and sit centered when closed. Off-centered blades are common after carry, pocket lint accumulation, or minor shocks. Some knives arrive slightly off-center out of the box due to manufacturing tolerances; others drift after regular use. Learning how to center a folding knife blade safely helps you avoid unnecessary teardown, preserves warranties, and keeps your knife functioning reliably.
Local considerations matter. If you live in the United States, United Kingdom, Canada, Australia or the European Union, you’ll find many knife modders, repair techs, and service centers in regional hubs (for example Seattle, Austin, Sheffield, Toronto, Sydney, or Solingen). Check local laws and service availability if you prefer professional help. For DIYers across global markets, the non-destructive sequence below solves most centering problems at home without tools beyond a few common drivers and a clean workspace.
Specs
This section lists the parts, tools, and boundaries for the least-invasive centering workflow. Do not proceed past the boundaries described here if your knife is under warranty or you are unsure how to reassemble it.
Common parts referenced
- Pivot screw and frame/scale screws
- Washers or bearings (phosphor bronze washers, caged bearings, or ceramic bearings depending on model)
- Blade tang and stop pin/stop screw
- Scales, liners, and spacer standoffs
- Blade thumb stud/clip—sometimes affects alignment if loose
Recommended tools
| Tool | Why |
|---|---|
| Correct driver bits (Torx or hex that match the screws) | Prevents stripping fasteners |
| Small standoff or pivot-friendly pry (plastic) and a microfiber cloth | For gentle cleaning and realigning scales |
| Lubricant (light gun oil, nano oil, or Teflon-based oil) | Reduces friction in pivot area |
| Toothpick or compressed air | Remove lint and debris from pivot and liner gaps |
| Torque driver (optional) | Useful when you want repeatable torque; not required for basic adjustments |
Warranty and safety boundary
Follow only non-destructive steps: cleaning, incremental pivot adjustments, light lubrication, and re-seating scale screws. Stop before complete disassembly (removing liners, pulling bearings out, or carving frames) if your knife is under warranty or you do not have manufacturer guidance. If the pivot requires full teardown or bearing replacement to restore centering, consult manufacturer service or an authorized repair technician to avoid voiding warranty.
Deep-dive analysis
Here is a focused, least-invasive sequence that addresses the majority of centering problems. Work through each step and test the blade’s position after every action. Don’t skip the inspection and cleaning step—most centering issues are caused by debris or uneven friction.
Step 1 — Inspect and document
- Hold the knife closed and visually check blade-to-scale gaps on each side at the back of the blade tang near the pivot.
- Note whether the blade contacts a scale (hard rub) or simply appears off-center without contact (cosmetic). Photograph or mark the side that’s closer for reference.
Step 2 — Clean the pivot area
Use a toothpick, compressed air, and a microfiber cloth. If you use a solvent, apply sparingly to avoid damaging handle materials. Remove lint, pocket debris, and old oil gunk that can create uneven friction.
Step 3 — Check and snug external scale/frame screws
Lightly snug any scale or frame screws. Loose scales can press the blade off-center. Tighten incrementally—don’t fully torque them; just remove obvious play. Always use the correct bit to prevent rounding fastener heads.
Step 4 — Adjust pivot tension carefully
Open the blade to a right angle and then close, using small pivot adjustments to find the sweet spot. The aim is smooth, play-free operation with the blade closing centered. Loosen the pivot slightly first if it is very tight, then re-tighten slowly while checking blade position. Make tiny changes: a quarter-turn or less at a time is often sufficient. If you have a torque driver, use a low, controlled setting and increase in small increments.
Step 5 — Lubricate and cycle
Apply a tiny drop of lubricant to the pivot area (not excessive). Cycle the blade 10–20 times to allow oil to seat and distribute. Re-check centering. Many knives center after the pivot friction is evened out by light lubrication and operation.
Step 6 — Re-seat the scales without full teardown
If scale screws are accessible and the design allows, loosen them slightly, align the scales so they sit flush, and re-tighten. Do this one screw at a time and retest. Avoid removing the pivot bushing or washers unless you are willing to accept warranty risk or are experienced with full disassembly.
Step 7 — Test for blade rub vs cosmetic centering
Close the blade slowly and feel for contact. Rub is audible and tactile; cosmetic offset will not create a hard stop or scraping sound. See the checklist in the Utility section for detailed differentiation.
Symptom-to-cause diagrams
Use this quick reference to map what you see to the most likely root causes. These are ordered from most common (top) to less common (bottom).
| Observed symptom | Most likely causes |
|---|---|
| Blade sits slightly to one side but closes without contact | Minor manufacturing tolerance, cosmetic centering, or uneven pivot friction |
| Blade hits/rasps against the scale when closing | Loose pivot or liner, burr/debris in pivot, misaligned scale/stop pin |
| Blade drifts to one side after opening/closing repeatedly | Worn or dirty washer/bearing, uneven lubrication, or bent blade tang |
| Sudden off-center after impact or drop | Shifted scale or frame screw, bent stop pin, or damaged washer/bearing |
Symptom -> Cause quick map
--------------------------
Slight visual offset, no contact  -> Manufacturing variance, light friction imbalance
Hard scrape/dent at close         -> Pivot loose, debris, misaligned scale/tab
Blade drifts while opening        -> Worn washers/bearings, uneven milling
Offset after drop                 -> Bent tang/stop pin or shifted hardware
Utility
This section gives practical tests, torque cautions, and a compact checklist so you can tell harmless cosmetic centering from actual blade rub that requires more work.
Practical tests
- Visual gap test: look down the spine from the clip end to the pivot and compare gaps at both sides under bright light.
- Audible test: close the blade slowly and listen—light rubbing has a soft rasp; hard contact is a sharp metallic click.
- Fingertip test: close the blade while feeling the path with your thumb (careful of sharp edges). A smooth close with uniform resistance is ideal.
- Manual pivot check: with the blade 90° open, gently wiggle at the blade tip to detect play; any loose pivot may indicate a need to tighten or re-seat hardware.
Torque cautions
Tightening fasteners correctly is critical. A few rules to follow:
- Use the correct bit and good fit to avoid stripping heads.
- Tighten in small increments. If you use a torque driver, start low and increase slowly—tighten until the blade opens and closes smoothly without lateral play. For many EDC knives the correct feel is “snug and smooth” rather than “bone tight.”
- Never force a screw beyond the feel of the metal; stop if you encounter resistance and check for cross-threading.
- If a screw seems stuck or damaged, stop and seek professional service to avoid head damage or structural harm.
Checklist: Harmless cosmetic centering vs blade rub
| Sign | Cosmetic centering | Blade rub / problem |
|---|---|---|
| Visual offset only | Yes — acceptable | No |
| Hard metal contact when closing | No | Yes — requires fix |
| Rasping noise on close | Sometimes soft rasp only | Usually yes (indicates contact) |
| Blade stops short or jams | No | Yes — likely rubbing or obstruction |
| Minor offset that disappears after cycling and lubrication | Yes | No |
Alternatives
If the least-invasive steps do not restore acceptable centering, consider these alternatives. Note warranty risks where applicable.
- Manufacturer service: safest for warranty preservation. Many brands offer free or paid pivot repairs and re-centering. This is recommended for new knives under warranty or when you suspect bent components.
- Local knife repair techs or experienced modders: Good option if you live in larger markets—look for reputable service centers in your region (major cities like Seattle, Austin, Sheffield, Toronto, Sydney, or Solingen are known knife hubs). Always verify reviews and ask about warranty implications.
- Aftermarket washers, bearings, or pivot kits: These can fix long-term wear issues but often require full disassembly and may void warranty. Proceed only with proper instructions and tools.
- Full teardown and rebuild: Only for experienced users. Removing bearings and liners or press-fitting parts can permanently alter your knife and void manufacturer warranty.
For additional reading or to browse related posts and product pages on KnifePulse, check our site maps:
Verdict
Most centering problems are solvable without risky teardown. Start by cleaning the pivot, snugging and cycling the pivot, applying minimal lubrication, and realigning scales if accessible. Use small, controlled adjustments and the correct drivers. Reserve full disassembly, bearing replacement, or aggressive modification for when manufacturer service or an experienced knife tech is not an option. When in doubt, especially under warranty, contact the maker or a certified repair center in your region.
Learning how to center a folding knife blade safely is less about brute force and more about careful observation, incremental adjustment, and knowing when to stop. Preserve your knife’s fit, function, and warranty by following the least-invasive route first.
FAQs
How do I tell if my knife blade is just cosmetically off-center?
If the blade appears off-center but closes without audible or tactile contact, and the resistance through the open/close motion is smooth, it is likely cosmetic. Light offset that evens out after cycling or lubrication is cosmetic. Use the visual gap test and audible test described above to confirm.
Will adjusting the pivot void my warranty?
Minor pivot tension adjustments using the original screws and correct drivers are usually acceptable and do not void warranty. However, full teardown, removal of bearings/washers, or replacing factory hardware often does void warranty. When in doubt, consult the manufacturer’s policy.
What if pivot tightening doesn’t center the blade?
If careful pivot adjustments, cleaning, and scale re-seating don’t help, the cause may be worn or damaged washers/bearings, a bent blade tang, or a shifted stop pin. At that point, contact the manufacturer or a reputable local knife repair technician to avoid voiding warranty or damaging the knife further.
Can I use thread locker to fix loose screws that affect centering?
Use of thread locker changes serviceability and can complicate future repairs. If screws back out regularly, first identify why (vibration, wrong screw length, stripped threads). If you choose to use a removable thread locker, use a low-strength product sparingly and be aware it may affect warranty or future serviceability.
Is it safe to sand or file the scale to improve centering?
Filing or sanding a scale is irreversible and can degrade fit or aesthetics. This should be a last resort and done only by experienced modders. Prefer adjusting hardware and pivot tension first; if material removal is necessary, consult a professional.